How-To: Add an Image in PowerPoint
Thursday, June 22, 2017
by Stephanie Orges
Life
How-To: Add an Image in PowerPoint
Whether you need to show a specific photo or you just want to add some visual interest to your PowerPoint presentation, you’ll need to know how to insert images.
Here’s the step-by-step:
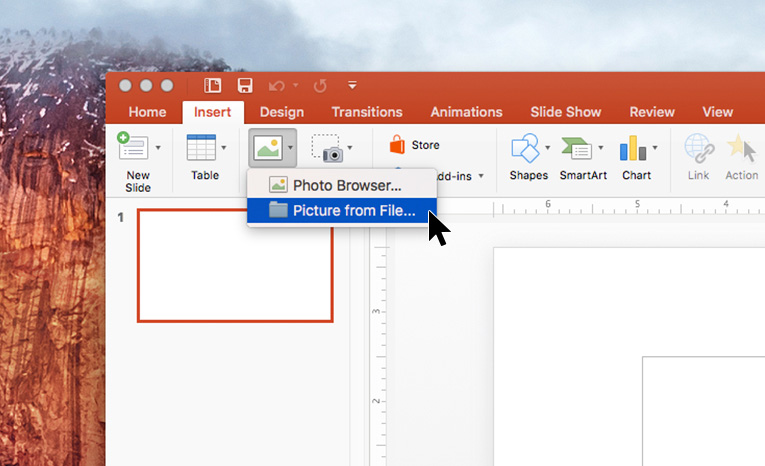
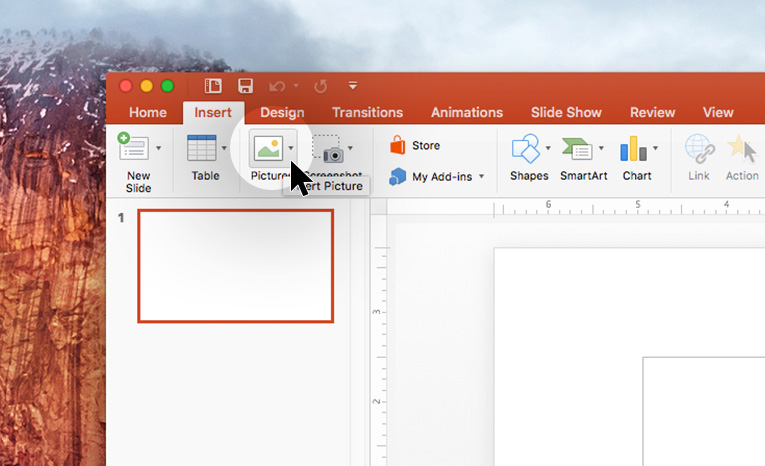
- Select the slide where you want the image.
- On the ribbon menu, under “Insert,” click the Pictures icon.
- In the dropdown, select “Picture from File…” to use an image saved on your computer, or “Photo Browser…” to use a stock image.
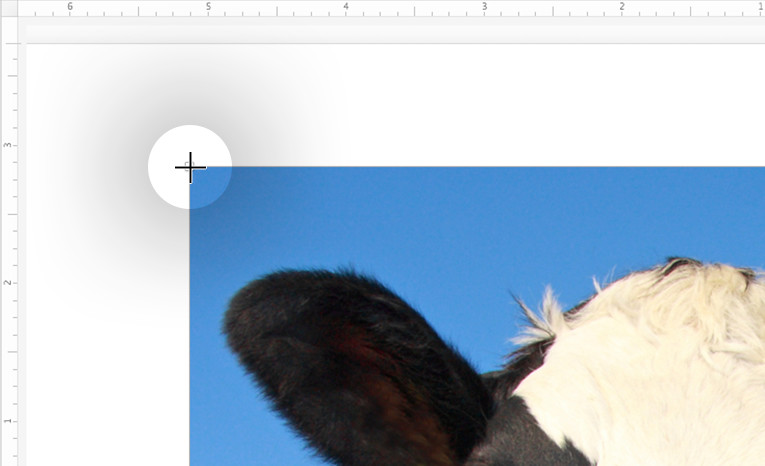
- Find the image you want, then double-click it or click and drag it to your presentation.
- To move the image, click and drag it from the center.
- To resize the image, click and drag at the corners (NOT the sides – that will stretch the image).
- To rotate the image, click and drag the green dot above the image.
Remember that less is more; avoid cluttering your presentation with too many images. Learn more with these 11 tips for your presentation’s structure and design.